My boyfriend and I are quite casual when it comes to Valentine's Day. We'll exchange a card and small gift, and might indulge in a takeaway, but we aren't ones for making a huge deal out of it. After all, it is 'just another day'. Saying that though, you wouldn't catch me saying no to these beauties.
1. I have been lusting after one of these little pastel macaroon trinket boxes for ages now. How sweet are they?! They're mainly available on US websites, but I have seen them on notonthehighstreet.com.
2. These go without saying. Champagne truffles are my absolute favourite and I now ask for them every birthday/Christmas/whenever I possibly can. Plus the heart shape box is a winner.
3. I've been burning a lovely 'cheesecake crunch' candle from flamingo candles and have nearly reached the end of the jar. What's a girl to do? Well, their new candy shop range sounds delicious and I'm feeling that I need the Parma Violets one next!
4. Etsy is always full of little gems and I just love this bracelet, with the quote from the amazing The Fault In Our Stars - 'I fell in love the way you fall asleep;slowly, then all at once.'
5. CAT MEASURING CUPS. Say no more. You can buy these cuties here.
6. I'm always on the look out for a pretty bag for my SLR, and this one is just perfect. They also have it in cream and pink too. And it's in the sale!
7. I can't get enough of wolf & moon. These earrings are just so beautiful. I love these ones, too.
Showing posts with label cat. Show all posts
Monday, 10 February 2014
Tuesday, 24 December 2013
Nails - Christmas mix 'n' match
Merry Christmas Eve! I hope you are as excited as I am :) I had to work yesterday, but now have the rest of the week off so obviously I decided to go all out with my nails last night - whilst drinking wine and watching The Holiday in celebration! Today I am going to do some baking for my mum (I've also promised I'll do her nails too!) and watch some rubbish television, before heading out for a few Christmas drinks with friends tonight.


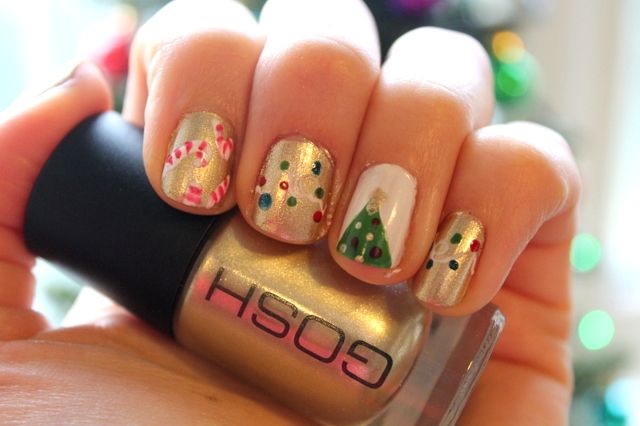
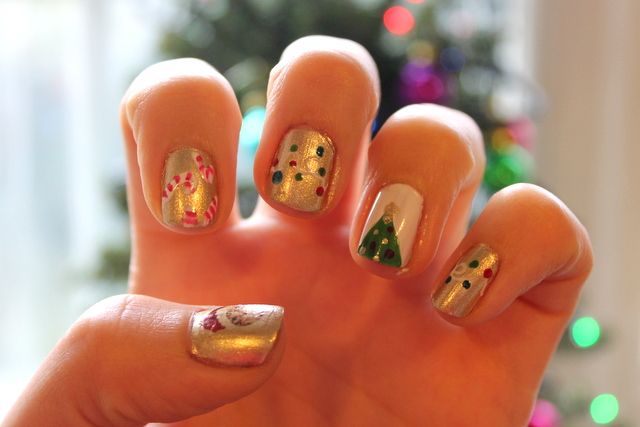
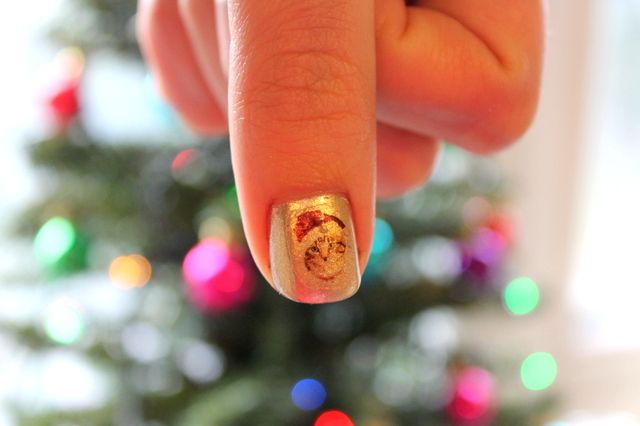
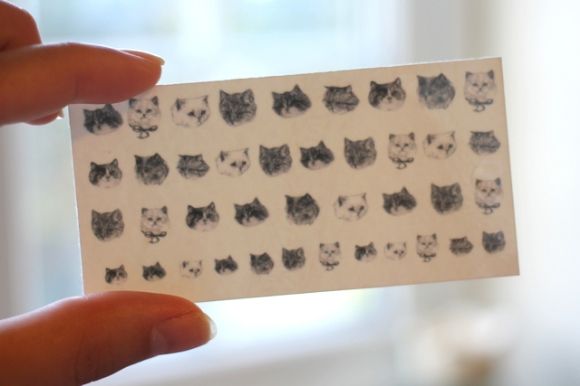
Anyway, onto the nails. I love this GOSH nail polish in the shade 'Gold', which I used as a base colour - minus my ring finger which I coated in L.A. Colors French White. I used a white nail art pen and a red nail art pen to make little candy canes, painted a little green Christmas tree onto my ring finger (complete with baubles and a star!) and made strings of Christmas lights using my white nail art pen again and various colours. Obviously, I couldn't resist a Christmas cat on my thumbnail - these were bought last year from here :)
I hope you all have a lovely Christmas! x


Anyway, onto the nails. I love this GOSH nail polish in the shade 'Gold', which I used as a base colour - minus my ring finger which I coated in L.A. Colors French White. I used a white nail art pen and a red nail art pen to make little candy canes, painted a little green Christmas tree onto my ring finger (complete with baubles and a star!) and made strings of Christmas lights using my white nail art pen again and various colours. Obviously, I couldn't resist a Christmas cat on my thumbnail - these were bought last year from here :)
I hope you all have a lovely Christmas! x
Saturday, 10 August 2013
Nails - Hello Harriet cat nail transfers
It's no secret that I am a total cat lady. If it's got a cat on it, I want it. If I go to my boyfriend's I go to stroke his cats first before giving Ben a kiss hello. If there's cat in the street and it runs away, Ben says it's because they're thinking 'quick, run, it's that crazy cat girl'...I'm the crazy cat lady without the cat.
So, obviously, I love all the gorgeous things Harriet makes. Her shop is full of all her amazing illustrated goodies, from notebooks to purses to phonecases. Mostly cute animal themed!

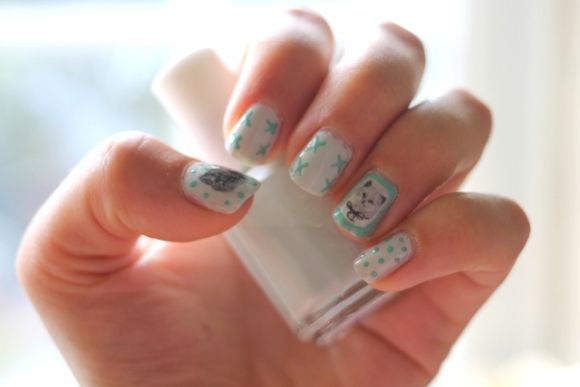
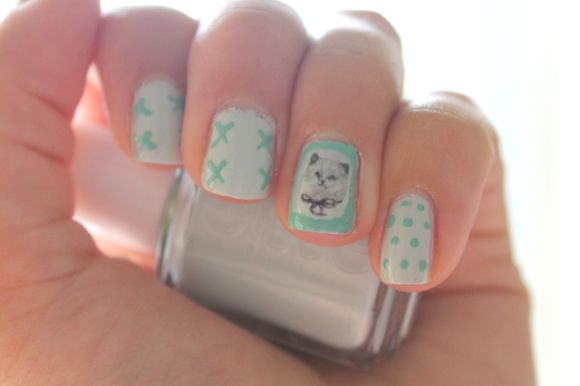
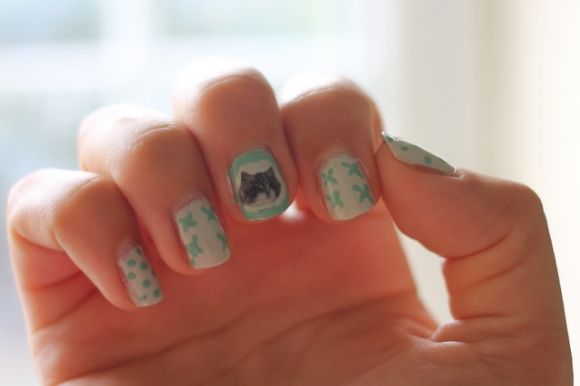
My friend bought me these kitty nail transfers for my birthday last month. They are so sweet and very easy to apply. I've used cat nail stickers before, but Harriet's apply just like those temporary tattoos - just dab with a wet cloth for 20 seconds and slide the paper away to reveal your cute kitty.


It's advised you use a light nail polish, so I went for Essie Absolutely Shore (one of my favourites, but a pain to apply I must admit)..I also used my new green models own nail art pen (also bought by my friend!) to doodle on my nails.
What do you think? Make sure you check out Harriet's website - so much love!
So, obviously, I love all the gorgeous things Harriet makes. Her shop is full of all her amazing illustrated goodies, from notebooks to purses to phonecases. Mostly cute animal themed!

My friend bought me these kitty nail transfers for my birthday last month. They are so sweet and very easy to apply. I've used cat nail stickers before, but Harriet's apply just like those temporary tattoos - just dab with a wet cloth for 20 seconds and slide the paper away to reveal your cute kitty.


It's advised you use a light nail polish, so I went for Essie Absolutely Shore (one of my favourites, but a pain to apply I must admit)..I also used my new green models own nail art pen (also bought by my friend!) to doodle on my nails.
What do you think? Make sure you check out Harriet's website - so much love!
Friday, 14 December 2012
DIY kitty flats
Here is a DIY that I had on my 'to do list' for quite a while. Somehow I just never got round to it before!

You may well have seen the Charlotte Olympia kitty flats - now, I love cats, but I certainly don't have £465 laying around for me to splurge on shoes. So a DIY was in order.
I've seen a couple of similar DIYs - here and here - which gave me a bit of inspiration. These were pretty easy to do - all you need is a pair of flats [I got some cheapies off everything5pounds], a pencil, paper, tracing paper and a needle and thread! Oh and a lot of patience...
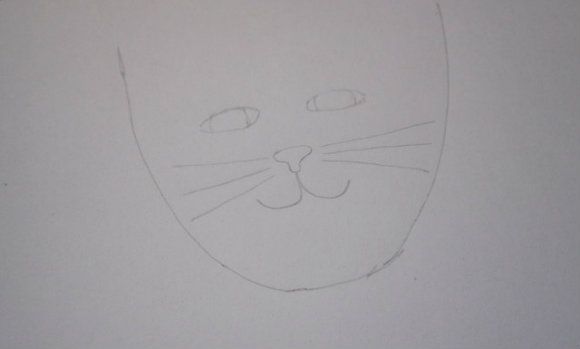
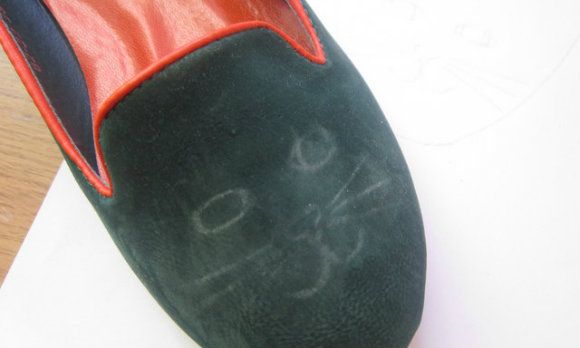
I started by tracing round the front of my shoe and drawing a simple cat face on paper. I then traced over it onto the tracing paper using a white pencil. I placed the tracing paper onto my shoe and rubbed the cat face on, to give me a bit of a guideline when sewing - it did rub off after a while but once I had started I kinda knew where abouts to sew the kitty features.


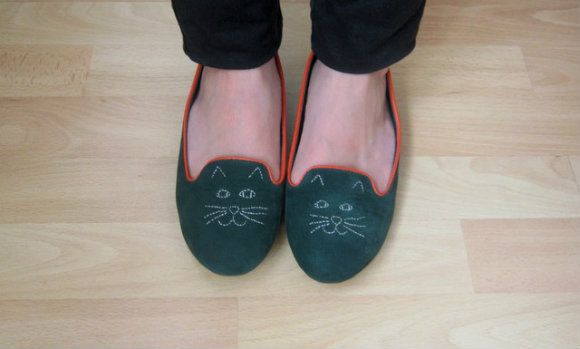
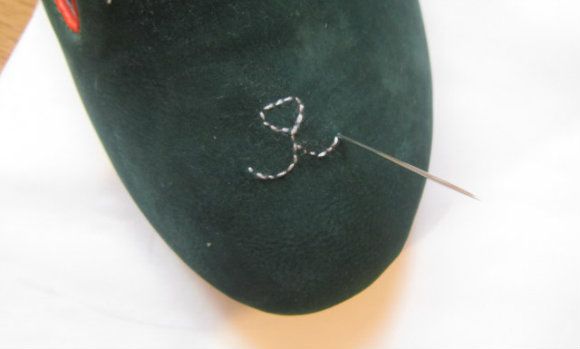
Get a good, strong needle as you'll need it. Sew along the cat face, starting from the bottom. Mine actually ended up smaller, and looking a little different from my original drawing, but it did help to have the guide there. I also added some ears in the end!

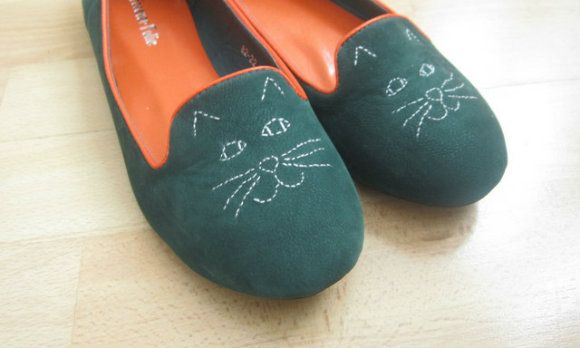
My shoes may not be perfect, with the sewing being a little shakey and the eyes not the exact same size [trust me, I tried to be a perfectionist, and get them exactly the same, but it just wasn't happening] but I'm pretty pleased with them! Not bad for a fiver :)

You may well have seen the Charlotte Olympia kitty flats - now, I love cats, but I certainly don't have £465 laying around for me to splurge on shoes. So a DIY was in order.
I've seen a couple of similar DIYs - here and here - which gave me a bit of inspiration. These were pretty easy to do - all you need is a pair of flats [I got some cheapies off everything5pounds], a pencil, paper, tracing paper and a needle and thread! Oh and a lot of patience...
I started by tracing round the front of my shoe and drawing a simple cat face on paper. I then traced over it onto the tracing paper using a white pencil. I placed the tracing paper onto my shoe and rubbed the cat face on, to give me a bit of a guideline when sewing - it did rub off after a while but once I had started I kinda knew where abouts to sew the kitty features.


Get a good, strong needle as you'll need it. Sew along the cat face, starting from the bottom. Mine actually ended up smaller, and looking a little different from my original drawing, but it did help to have the guide there. I also added some ears in the end!

My shoes may not be perfect, with the sewing being a little shakey and the eyes not the exact same size [trust me, I tried to be a perfectionist, and get them exactly the same, but it just wasn't happening] but I'm pretty pleased with them! Not bad for a fiver :)
Subscribe to:
Posts (Atom)